Toolbars
Repositioning toolbars and turning toolbars off
In the course of your work, you may wish to move individual toolbars away from their original positions and either dock them at the bottom and sides of LEGION Model Builder interface or leave them floating over the workspace.
To reposition a toolbar:
- Click-and-hold on the vertical dotted line to the left of the toolbar you want to move.
-
Do one of the following:
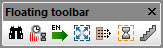
Drag it to a suitable position over the workspace and release the mouse button to create a floating toolbar.
or
Drag it to the bottom or the sides of LEGION Model Builder interface to dock it there.
You can return any toolbar to its original position by clicking and dragging it back into place. Any changes to your toolbars are lost if you reinstall LEGION Model Builder.
You can also turn toolbars off to make more space on the interface.
To turn a toolbar off:
-
Select
.
The ‘Customise’ dialog box is displayed.
- Click on the Toolbars tab.
-
Uncheck any toolbars you want to turn off.
As you uncheck each toolbar, notice that it disappears from LEGION Model Builder interface.
To turn a toolbar back on, repeat the procedure but this time check the relevant box next to the toolbar’s name.
- Click Close.
Creating a custom toolbar
There are many ways to customise LEGION Model Builder’s array of menus and toolbars. This section shows you how to create a custom toolbar, which can be helpful if you tend to perform certain tasks and not others. A custom toolbar can also help make a little more space in LEGION Model Builder interface.
To create a custom toolbar:
-
Select
.
The ‘Customise’ dialog box is displayed.
- Click on the Toolbars tab.
- Click the New button.
-
Type a name for the new toolbar and click
OK.
A new, floating toolbar is created.
- To add a tool button to the new toolbar, click and drag an existing icon onto the new toolbar. A black line appears to guide the placement of the icon.
- Add as many further icons as you require.
- When you have added all the icons you need, click Close.
-
Drag the new toolbar into position.
You may now wish to turn off some of the other toolbars; see "To turn a toolbar off:" above.